This can be used to create a Virtual Machine that is not using the Spire VA Installer default values.
Installation Steps
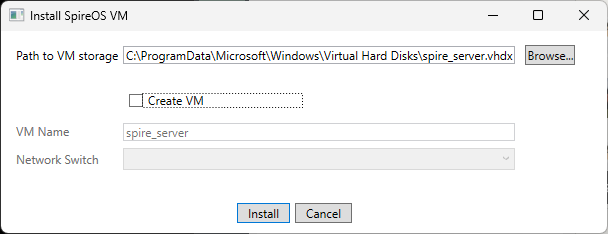
1. Run the Installer
On the Install SpireOS VM screen:
A default value for the Path to VM storage is provided, but you can modify if you want to store the VM internal data in a different location
Remove the checkmark in Create VM to create your own HyperVisor Virtual Machine later
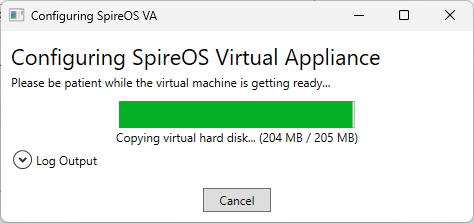
2. Configure the Virtual Appliance
The system begins creating the vhdx file for the SpireOS virtual machine.
This process typically takes a few seconds.
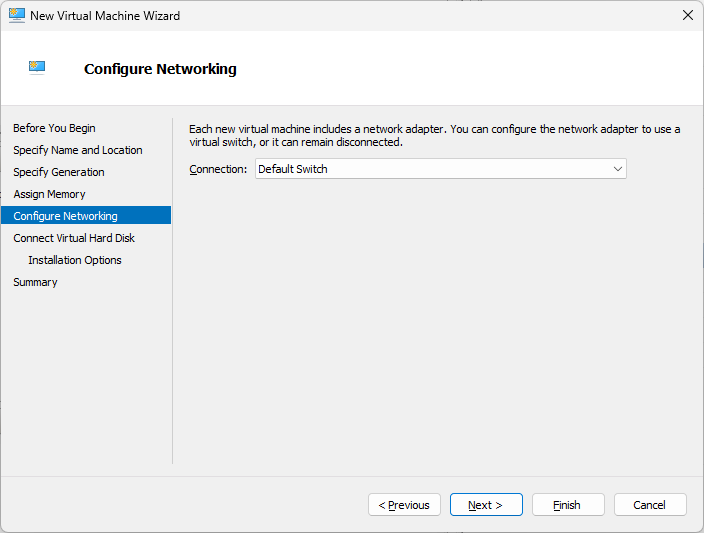
3. Create the Virtual Appliance
You can open Hyper-V Manager and create a Virtual machine with custom settings.
i.e. Dynamic Memory or Virtual NUMA
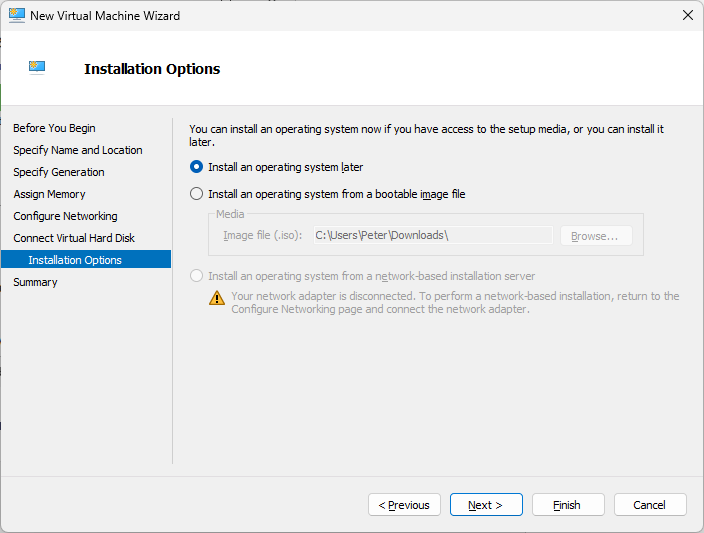
4. Ensure that you select a Connection in Configure Networking
5. Ensure that you connect the Virtual Hard Disk created in step 1.
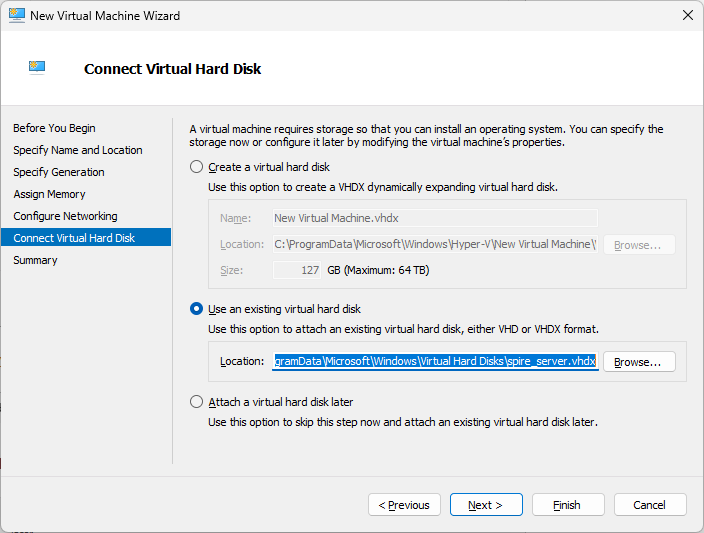
6. Do not install an Operating System since the vhdx file already contains one. Click Finish.
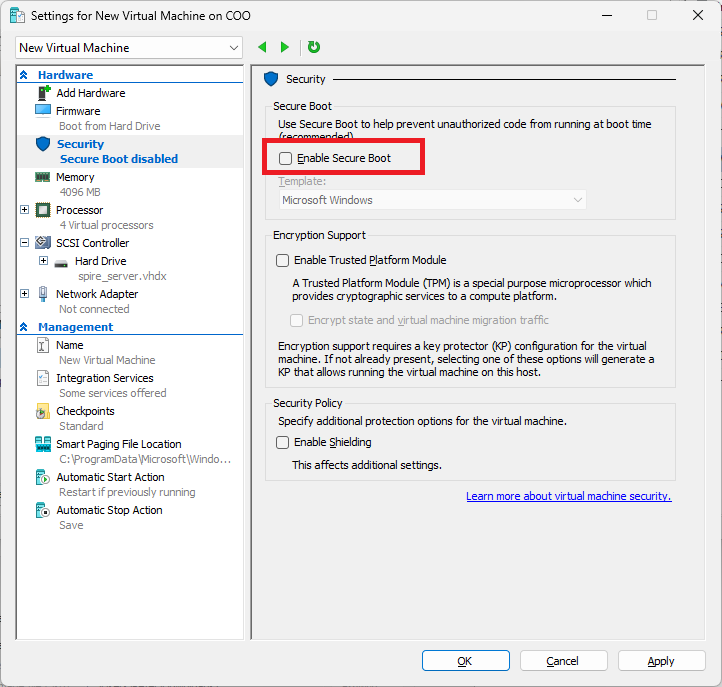
7. Change the settings for the new Virtual Machine in HyperVisor
Remove the checkmark from Enable Secure Boot and click Apply
8. Start the new Virtual Machine in HyperVisor
You may also connect to the Virtual Machine's console once it has been started to see the completion of the installation.
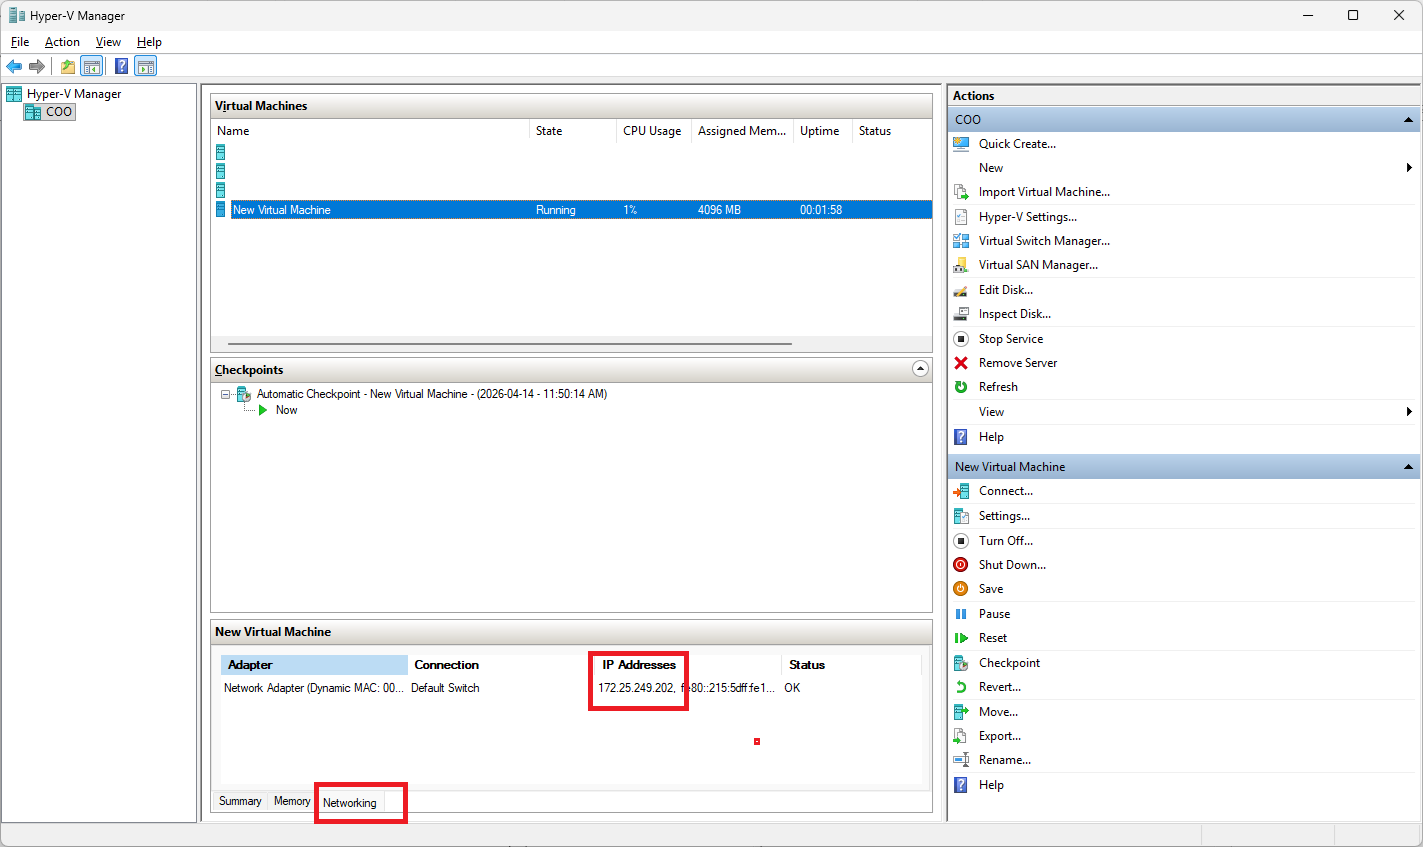
9. Get the IP address of the new Virtual Machine
Once the Virtual Machine has completed it's initial start up then you can retrieve the IP address from the Networking tab.
10. Enter the IP address into a browser to be directed to the Spire VA Setup page
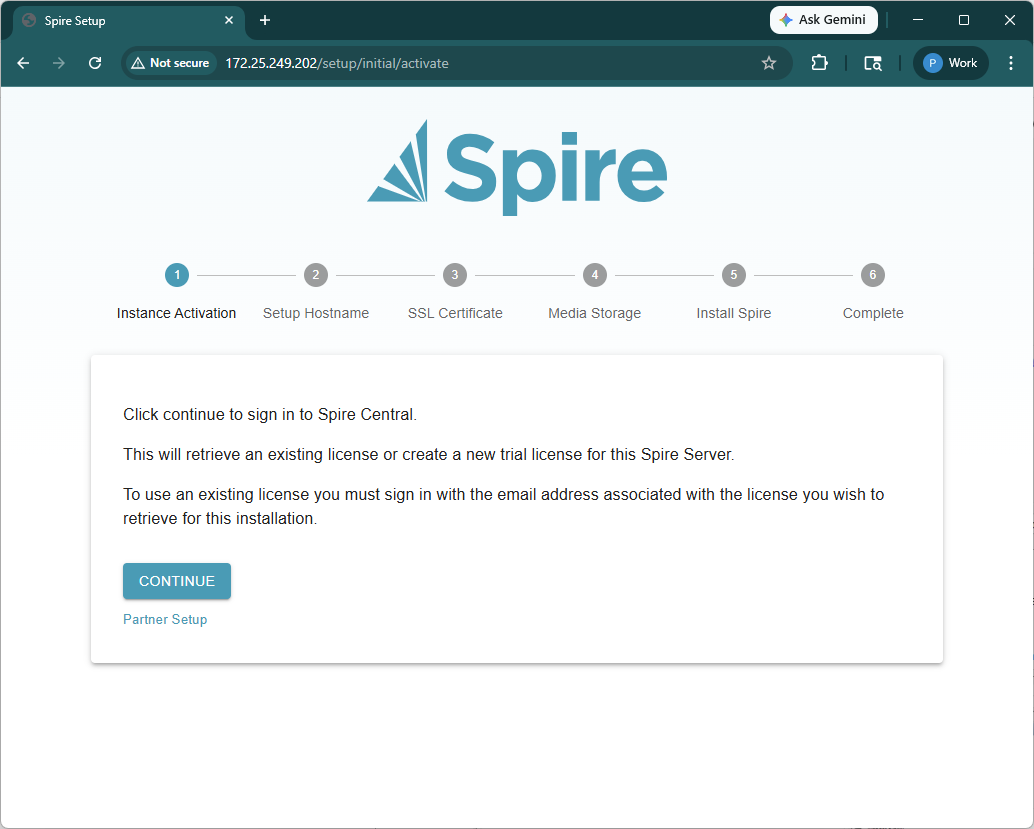
You are now at Step 3 of https://support.spiresystems.com/support/solutions/articles/13000114850-spire-virtual-appliance-installation so please continue from there.